Sneak-a-peek ? 
TIMING BELT , fast crank to
cam timing check. (See Acid test here)This page if for those, that don't do the 60K service.
Skip #2 Distributor "Dizzy" step , only the cam belt counts and it's keys, and the 6 point alignments or you will get a bad engine ! (low compression) Step 3 is the only true way to get #4 firing.
The CAM is always timed to #4 firing, if you can not understand that, you will FAIL ! #4 is the rear cylinder.
This audit procedure allows you to find a very common timing belt slip, fast.
This simple audit , will show why your 150 to 170 PSI compression is now near 80 PSI. In about 30 minutes work,,, the acid test at the bottom of this page, cures all the other causes of low compression.
If lash is set wrong, you can, in fact get bad compression, and is usually horrible bad, and gets worse hot, and burns the valves to a crisp.
17mm deep wall socket .
10mm ratchet and socket , of any kind.
Steps:
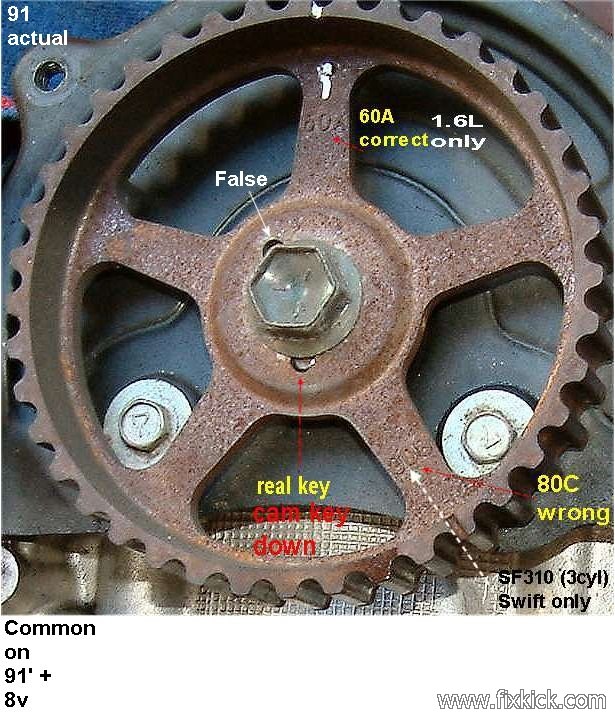
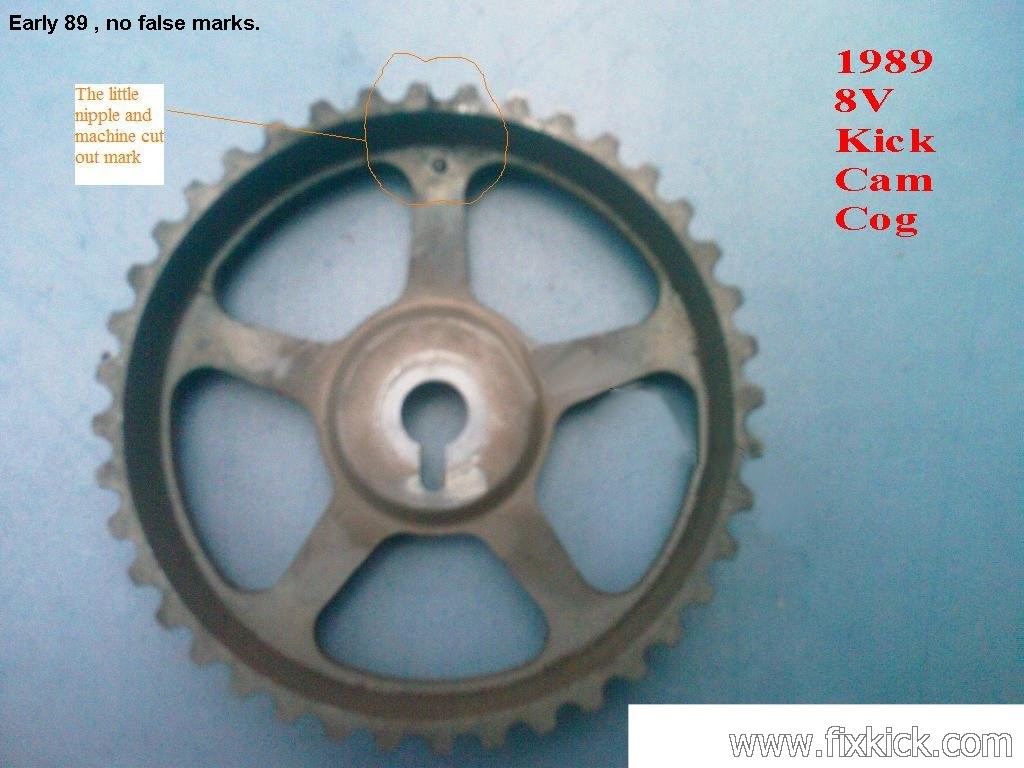
There are many cam cogs wheels, some have extra and false makes ("I") while the 89 year has no such thing, just a titty mark on the spoke and outer rim machine mark. (the 16v is rife with wrong marks, take care...)
- Remove distributor cap.
- Place 17mm socket on big crank bolt turn it CW until
the
distributor rotor tip, lands on #4 spark wire
terminal
EXACTLY. (assumes perfect running motor, and dizzy timed
right !) (this step assumes
spark wires routed correct)!
- If unsure that the dizzy is timed correctly? , you must
pull the valve cover and find #4 at TDC and all valves with loose lash
and cam lobes on the heals. (this is the only true path to success) turn the
crank until ,this is attained.
- Then looking at the TDC mark on the bottom pulley edge,
set the
crank to exactly TDC aligned to 0
mark on Tbelt
cover scale.
- Remove the upper
plastic timing belt cover
screws, as
many as you can reach, easy. 10mm heads.
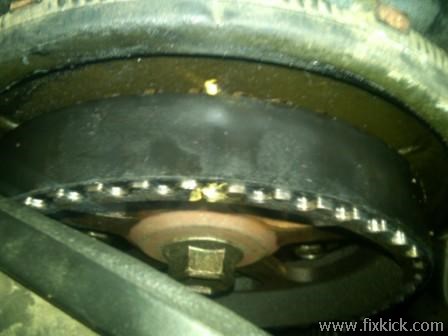
- The cover is very flexiable, so you pry it back as the photo clearly shows.
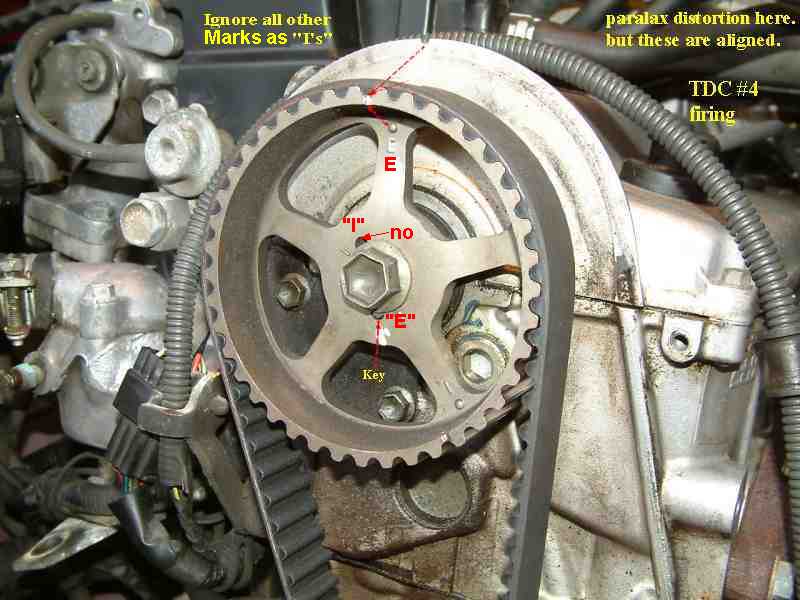
- The outer rim has a notch, this notch must align with the top cam cog back panel 12 pm notch , exactly (plus or minus 1/8 th inch)
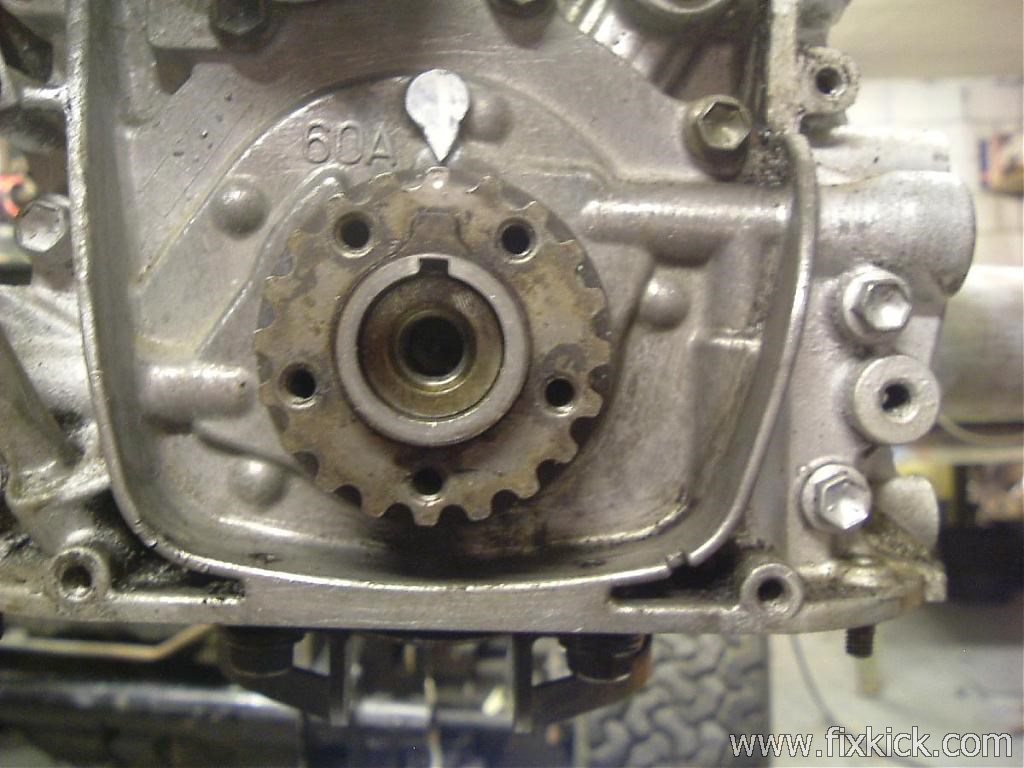
- Now look below and see if E spoke is UP (16v) or the Late 60a Cog is up 8V. (old 89/90 style Cam Cog)
- The old
89/90 8v cogs
look like this and has just a titty and no extra , false keyways.
- If the cam cog top notch does not align perfectly
with the
back pan 12 pm notch the belt has slipped ( or was installed wrong).:
Slipped belts usually retard the cam, so bad, you get only 80 PSI
compression.
- Never ever use any "I" mark or Keyway (that is for
DOHC Suzuki Swift
motor , not ours.
- If this test passes, the belt is timed Okay, but it don't
prove
the crank cog key is not stripped. The Acid test below , proves that
out. Only the ACID test, proves all issues with the cam timing.
The above, only finds slipped belts.
The Acid test, for bad keys and all ways to fail (factory spec, for #4 firing, TDC) The bottom key fails, because nobody reads factory TSB on topic, every one is caused by that FACT !
This is for serious mechanics, that can't get good compression on all 4 cyclinders (lash good)
16v (8v in red)
cam key down
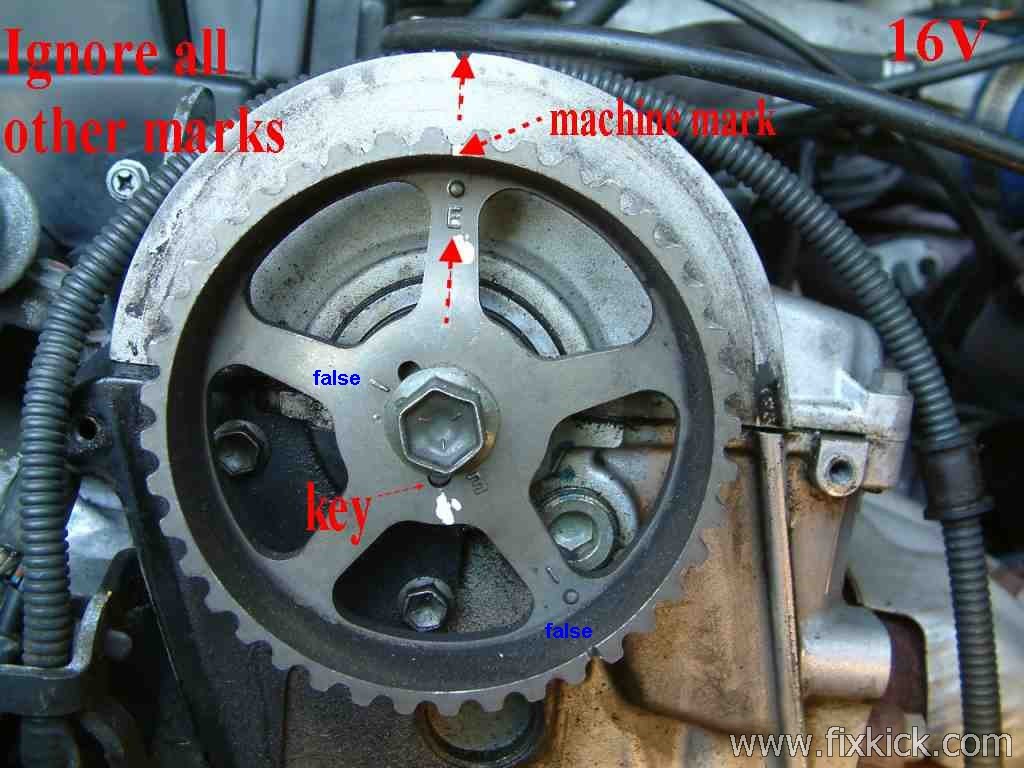
cam sprocket key to E slot in (hub) (early 8v has no extra slot) see that here.
cam sprocket E spoke , rim mark at 12pm at top back pan mark (early 8v has no E, only a titty here)
crank key up (12pm)
crank cog mark (slash) 12pm
crank cog slash aligned with 12pm arrow on pump housing . 6 points aligned, then belt set right.
All belts fail for 1 reason, the owner did not do the 60,000 mile mandatory service.
rev 3 ++++ 10-07-2010 this is not my work ; this photo is from a poster on the suzuki forums. Added ACID test.