2.5L V6 Front Oxygen sensor replacements

See photos, below. 1024 pixel wide if you down load them.
Getting them out is very hard but putting them back is vastly easier.
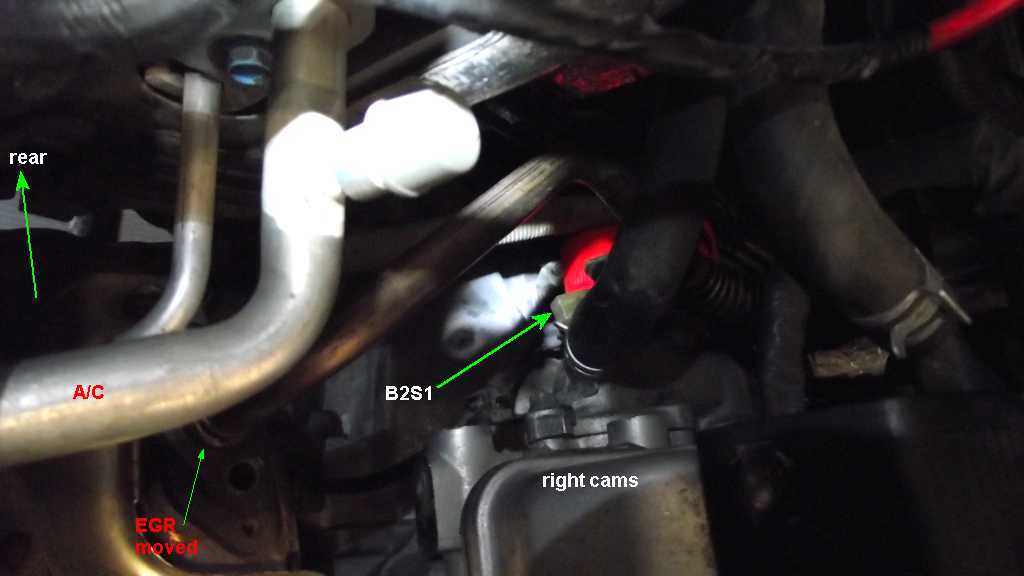
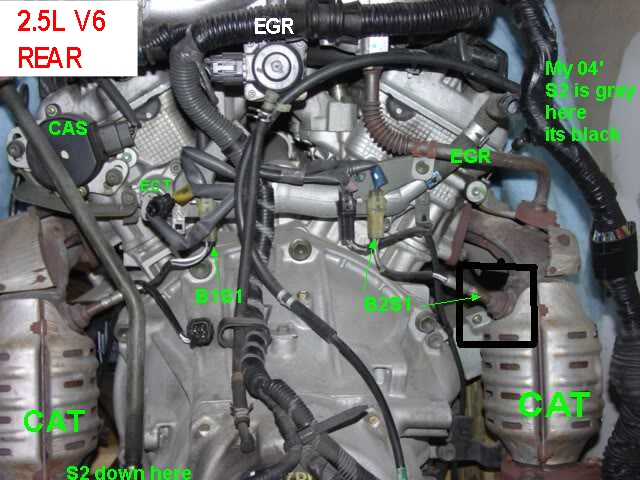
I pulled the battery, so I could fit my body behind, Bank2 (B2S1)
I pulled the EGR exhaust feed pipe, as you can see .
Now the horror, the 4 connectors are affixed, to a steel plate, to the rear of the motor, in a place no man can go. (with out pulling whole intake system !)
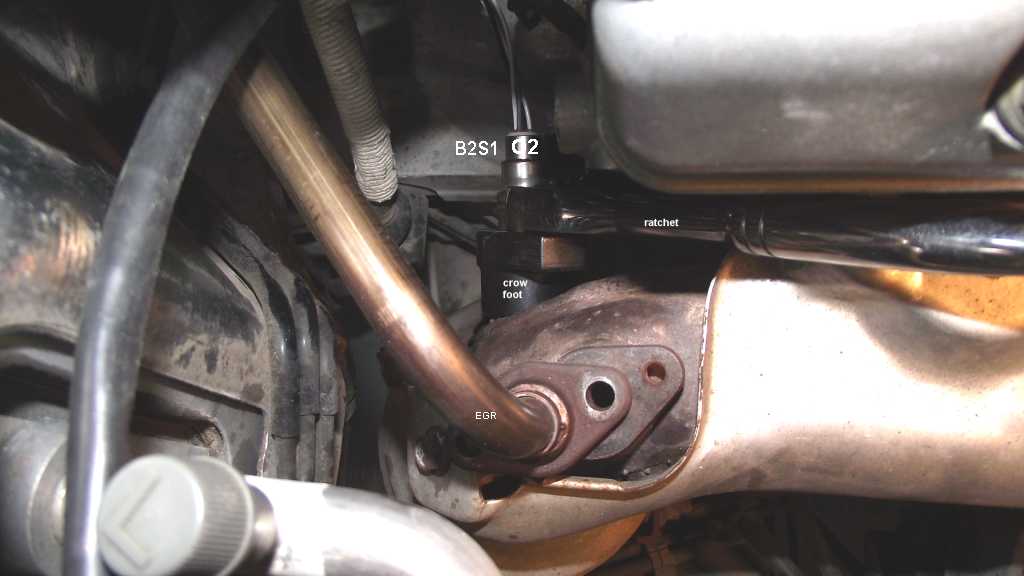
The first step is to unplug them, so you can unscrew the sensors from the exh.
You need this tool for this V6 motor . Below is a 2004. (typical of 99' to many years later)
Schley Products, Inc SCH88750A Super Duty 12 & 6 Point Oxygen Sensor Wrench "Amazon $25""By far the best crow foot made. (has 6point and 12 all in one tool!)
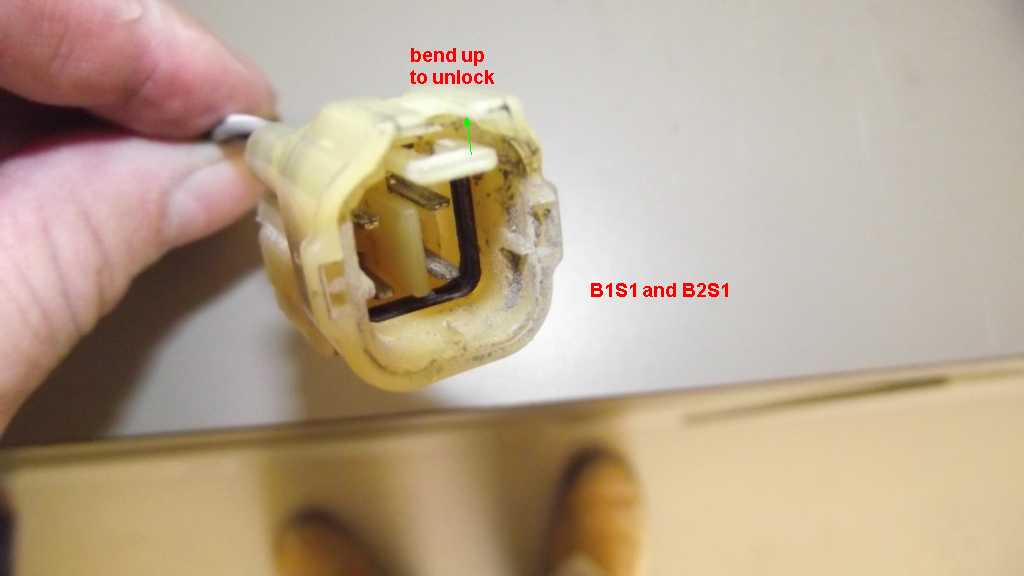
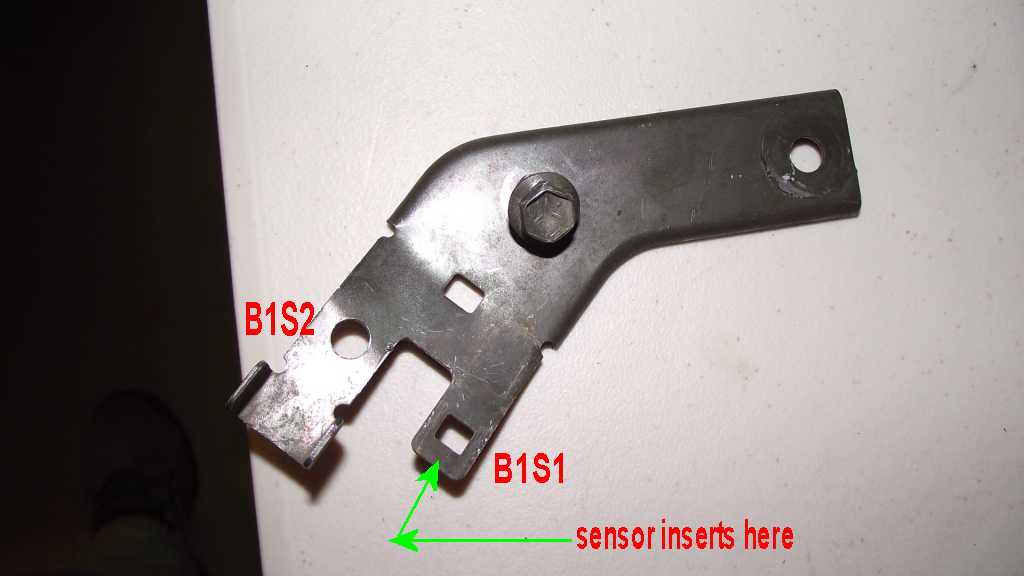
The Left side , I had to remove the metal bracket from the rear of the block, so I could see how it was fixed to this bracket , there is a tine release lever ( so very hard to release see last photo's)
After releasing the plug from the plate I could see the other lever to release and the connectors parted. ( 1 hour labor +)
After doing this easier Left side, I did the same trick, to the right side , by feel. (1 more hour)
I have photos below to show the magic levers and there release directions, using green arrows.
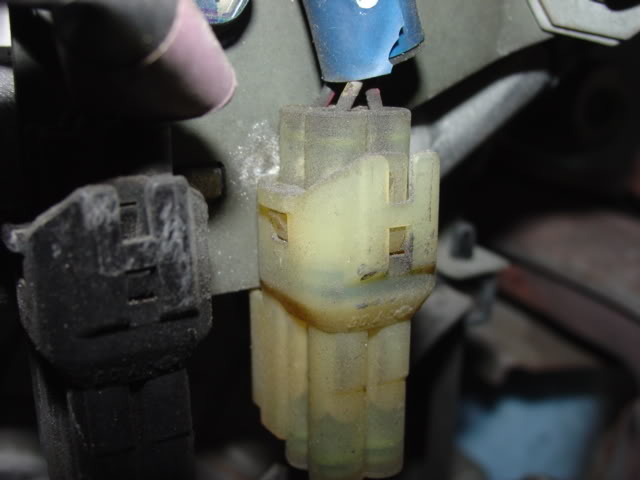
By the way, the rear sensors, use a different connector completly, just to fool you. (rear sensor connectors are GRAY)
Once both connectors are free, the job is easy street.
Tricks/Hints
1: remove battery
2: move EGR tube.
3: remove rear plate with 10mm head screw.
I put the wiring back using only tie-wraps, for easier next service.
An Upgrade path ?, is to use water proof connectors the Tyco maker shows and , like all new cars use.
Left bank:

Right bank sensors .
Step 4 I am installing the right sensor to the right exhaust O2 bung using my fancy dancy tool and ratchet. No other tool will fit, I promise.
This is Step 2: you now just lever up on th tab here, and the connector parts. this is easy.
This is step 1 below , left and right. you MUST remove this section form the metal bracket , this bracket has a tab that fits and locks to this connector.
You must depress the tab as shown and then pull gently , (sounds easy and is , but not so blind by feel)
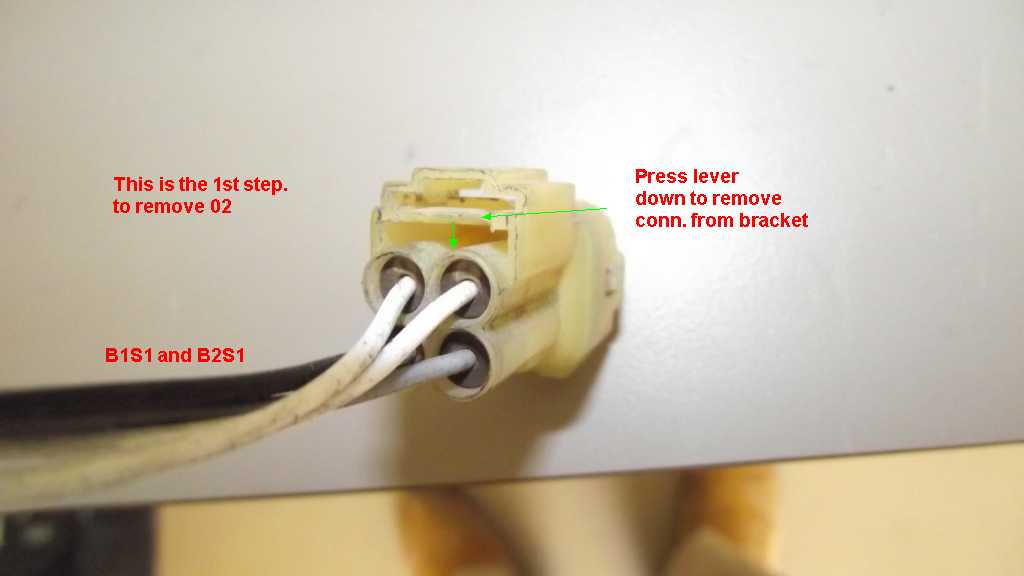
The above connector is locked onto the below Tab (green arrows) , see square hole, that is the horror hole, working blind (by feel)
Mounted: below: (ignore the yellowish side taps there, they are useless)
Best of all, a rare rear view; from MAX ! Sensor 1 is on top always, the Bank 2 is on the right below. S1 sets the air fuel ratio.
New Bosch connection made.
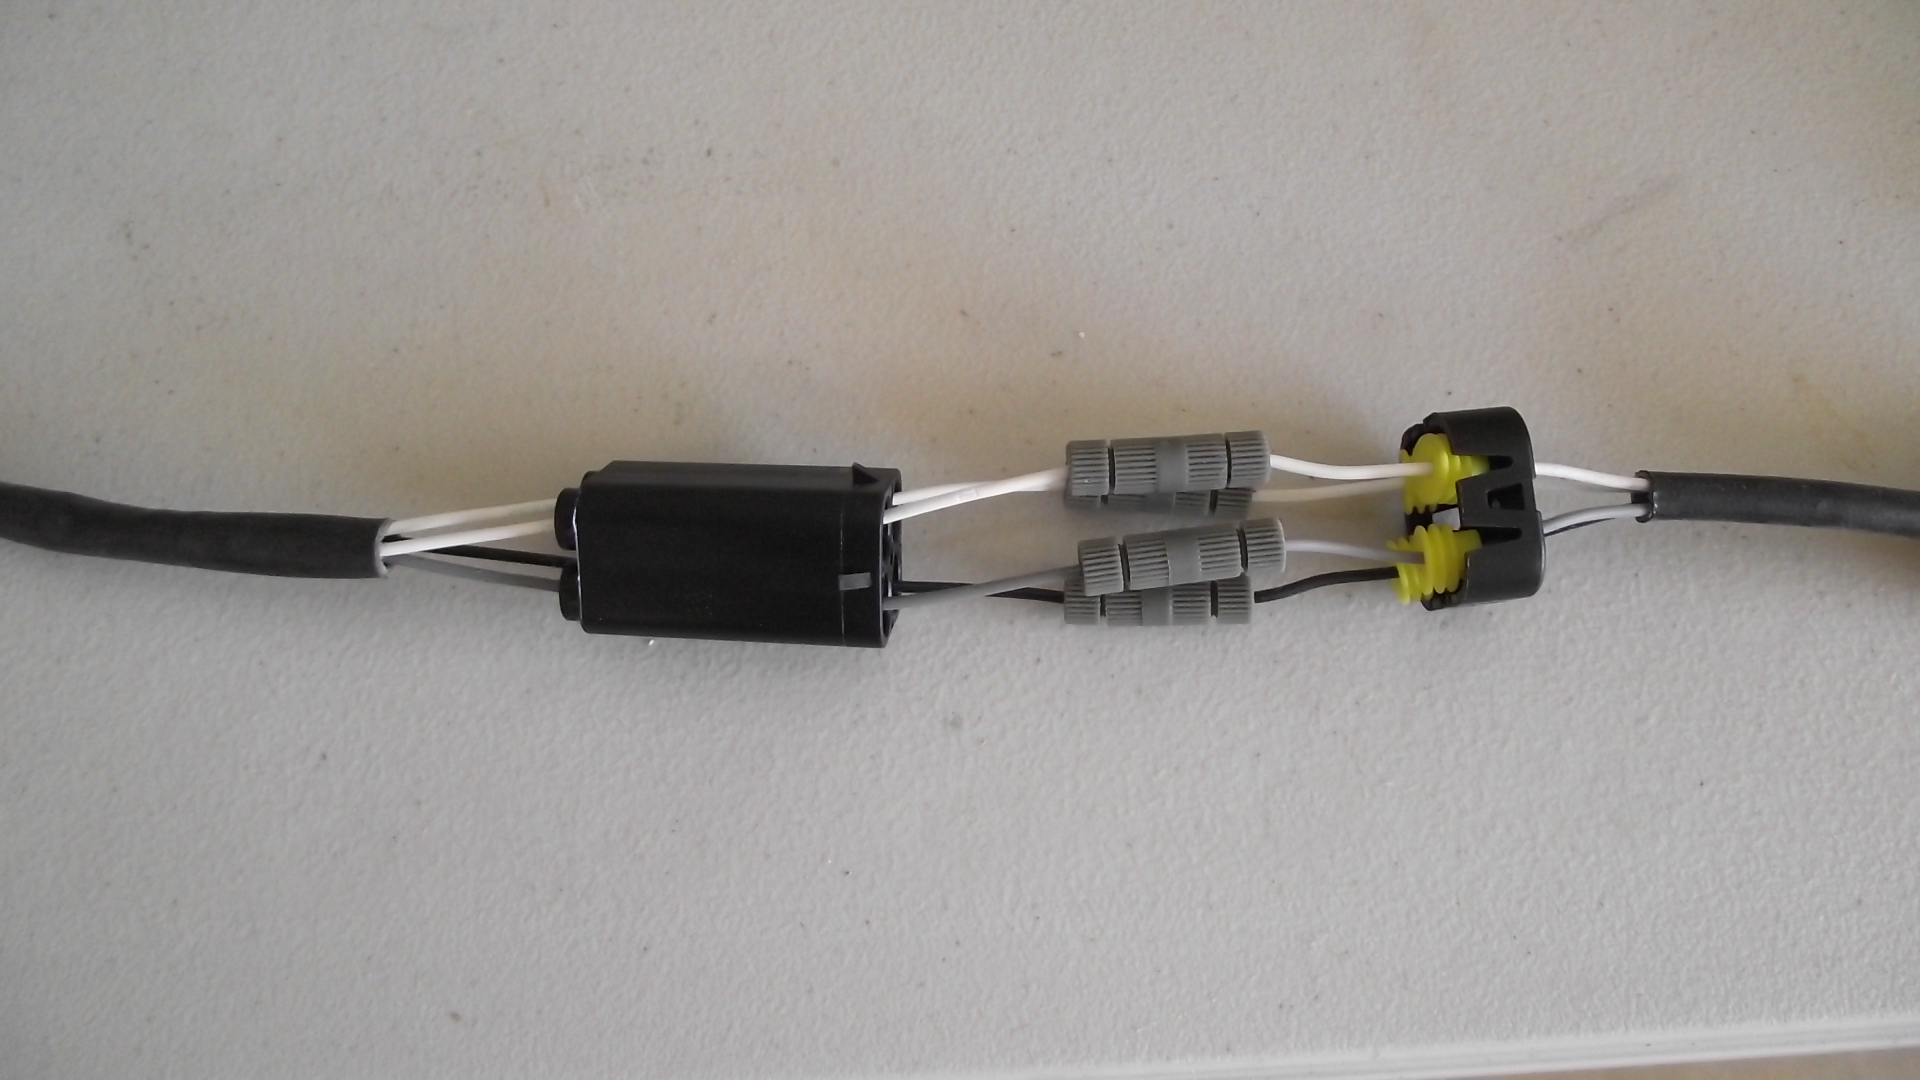
Step 3: we make up new 02 assembly.

O2 sensor part numbers
and wire colors are all here.
rev 1 ++++ 3-22-2011